As an Amazon Associate I earn from qualifying purchases. This post contains affiliate links, which means I may earn a small commission — at no extra cost to you — if you buy through them. I only recommend things I believe are genuinely worth your time.
If you’re looking for a buchu kimchi recipe that delivers fresh, vibrant flavor without the long fermentation wait of traditional cabbage kimchi, you’re in exactly the right place. Korean chive kimchi (buchu kimchi) is a quick-fermenting banchan that brings a wonderful garlicky punch and satisfying crunch to any Korean meal. Unlike its cabbage cousin that can take days or weeks to reach peak flavor, buchu kimchi is ready to enjoy in just 1-2 days, making it perfect for when you want homemade kimchi without the extended timeline.
Korean chives, known as buchu in Korean, have a distinct flavor that falls somewhere between regular chives and garlic chives—more robust and slightly garlicky compared to Western chives. When transformed into kimchi, these slender green stalks become an addictive side dish that pairs beautifully with rice, noodles, or grilled meats. The best part? You don’t need any special fermentation equipment or advanced kimchi-making skills to achieve restaurant-quality results at home.
Understanding Korean Chive Kimchi and What Makes It Special
Buchu kimchi holds a unique position in the kimchi family. While napa cabbage kimchi (baechu kimchi) is the undisputed king of Korean fermented vegetables, korean chive kimchi offers something different—a quicker preparation time, a more delicate texture, and a flavor profile that’s both milder and more aromatic. The chives themselves are tender enough that they don’t require the salting and rinsing process that cabbage does, which cuts your active preparation time roughly in half.
The fermentation process for buchu kimchi moves faster because of the chives’ tender structure and higher surface area relative to their volume. While a whole cabbage kimchi might take 3-5 days at room temperature to develop good flavor, korean chive kimchi reaches an excellent eating stage in just 24-48 hours. This makes it ideal for beginner kimchi makers who want to experience the satisfaction of homemade fermented foods without committing to a lengthy process.
Traditionally, buchu kimchi appears on Korean tables during spring and early summer when Korean chives are at their peak—tender, vibrant, and full of flavor. The seasonal timing means you’re working with vegetables at their nutritional best, packed with vitamins A and C, along with beneficial compounds that support digestive health. If you’re exploring Korean food and cooking traditions, this recipe is an excellent gateway into the world of fermentation.
Essential Ingredients and Ratios for Your Buchu Kimchi Recipe
Getting your ingredient ratios right is the foundation of successful buchu kimchi. For a standard batch using 1 pound (about 450g) of Korean chives, you’ll need a carefully balanced kimchi paste that provides the right levels of spice, umami, sweetness, and saltiness. Here’s what you’ll need and why each ingredient matters:
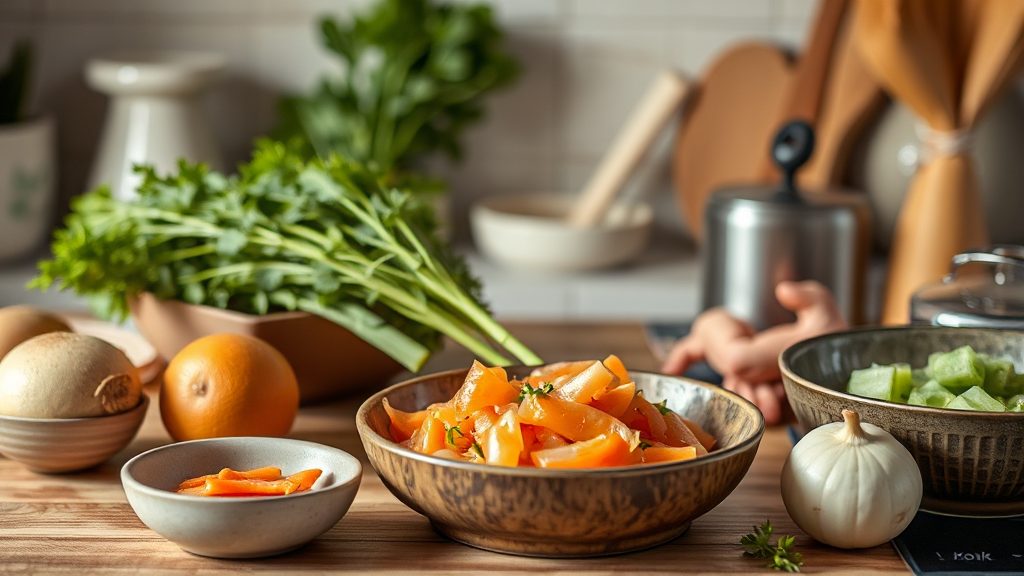
- Korean chives (buchu): 1 pound, cut into 2-3 inch lengths. Look for chives that are bright green with firm stems and no yellowing.
- Korean red pepper flakes (gochugaru): 3-4 tablespoons. This is your heat source—use less if you prefer mild kimchi, more if you like it spicy. Always use Korean gochugaru rather than regular red pepper flakes, as the texture and heat level are completely different.
- Fish sauce: 2-3 tablespoons. This provides the essential umami depth. For vegetarian versions, substitute with additional soy sauce plus a bit of kelp powder.
- Soy sauce: 1 tablespoon. Adds savory complexity and color.
- Garlic: 5-6 cloves, minced. Don’t skimp here—garlic is a defining flavor in buchu kimchi.
- Ginger: 1 teaspoon, minced. Provides a subtle warmth that balances the garlic.
- Sugar: 1-2 teaspoons. A small amount of sweetness balances the salt and spice. Some recipes use rice syrup or even a small piece of Asian pear.
- Water: 2-3 tablespoons. Helps create a paste consistency that coats the chives evenly.
- Sesame seeds: 1 tablespoon, optional but recommended for added nuttiness and texture.
- Green onions: 2-3 stalks, optional but traditional, cut into similar lengths as the chives.
🍯 Pantry staple: oligodang lasts a long time and shows up in tons of Korean recipes. Grab the one I reach for →
As an Amazon Associate I earn from qualifying purchases.
🐟 Pantry staple: one bottle of quality fish sauce lasts ages and elevates everything. Grab the one I reach for →
As an Amazon Associate I earn from qualifying purchases.
🌊 Making Korean stock? Dashima (dried kelp) is the base of clean, umami-rich broth. Here’s the dried kelp I use →
As an Amazon Associate I earn from qualifying purchases.
🥢 Pantry staple: keep toasted sesame seeds within reach for namul, rice, and marinades. Grab the ones I use →
As an Amazon Associate I earn from qualifying purchases.
🌶️ Stocking your Korean pantry? Good gochugaru is the one ingredient worth ordering online — this coarse Korean red pepper powder is the one I keep on hand →
As an Amazon Associate I earn from qualifying purchases.
The ratio of gochugaru to chives is where you have the most flexibility to customize based on your heat tolerance. Traditional Korean home cooks might use anywhere from 2 tablespoons for a mild version up to 6 tablespoons for a fiery batch. Start conservative on your first attempt—you can always add more heat, but you can’t remove it once it’s mixed in.
One ingredient note that’s worth emphasizing: the quality of your gochugaru makes an enormous difference in the final product. Korean red pepper flakes have a complex, slightly sweet, smoky flavor with moderate heat. If you substitute with generic red pepper flakes, you’ll end up with a harsh, one-dimensional spiciness that overwhelms the delicate chive flavor. Invest in a good bag of Korean gochugaru—it will last you through multiple batches and elevate all your Korean cooking.
Step-by-Step Process for Making Buchu Kimchi
Learning how to make buchu kimchi is refreshingly straightforward compared to other kimchi varieties. The entire active preparation time takes about 20-30 minutes, and the technique is forgiving enough that even first-time fermenters can achieve excellent results.
Start by thoroughly washing your Korean chives under cold running water. Chives can harbor dirt at the base where the stems meet, so pay extra attention to that area. Once clean, shake off excess water and pat them gently with a kitchen towel—you want them damp but not dripping wet, as excess water will dilute your kimchi paste. Cut the chives into 2-3 inch segments using sharp scissors or a knife. Some cooks prefer to keep them slightly longer for a more dramatic presentation, but the 2-3 inch length is most practical for eating.
Next, prepare your kimchi paste by combining all the seasoning ingredients in a bowl large enough to accommodate the chives. Mix the gochugaru, fish sauce, soy sauce, minced garlic, minced ginger, sugar, and water into a thick, uniform paste. The consistency should be similar to a thick barbecue sauce—pourable but clingy. If it seems too thick, add water one teaspoon at a time until you reach the right texture. If it’s too thin, add a bit more gochugaru.
Now comes the mixing stage, which is best done with your hands (wear gloves if you’re sensitive to chili). Add your cut chives to the bowl with the paste and gently but thoroughly massage the seasoning into every piece. You want complete coverage, but you also want to avoid breaking the chives, which can make them mushy. The mixing should take 2-3 minutes of gentle tossing and coating. If you’re adding green onions or sesame seeds, fold them in at the end of this process.
Pack your seasoned chives into a clean glass jar or airtight container, pressing down gently to eliminate air pockets. Leave about an inch of headspace at the top, as the kimchi will expand slightly during fermentation. Seal the container and let it sit at room temperature (ideally around 65-70°F or 18-21°C) for 24-48 hours. During this time, you’ll want to “burp” the container once a day by briefly opening the lid to release built-up gases—a normal part of fermentation.
How Long Does Buchu Kimchi Take to Ferment?
Buchu kimchi typically reaches optimal flavor after just 1-2 days of room temperature fermentation, making it one of the fastest kimchi varieties to prepare. You can taste it after 24 hours and decide whether you prefer it at that stage or want to let it develop for another day.
The fermentation timeline depends heavily on your kitchen temperature. In a warm kitchen (above 72°F or 22°C), your quick kimchi recipe might be perfectly fermented in just 24 hours. In cooler conditions, it might take the full 48 hours or even up to 3 days to develop that characteristic tangy flavor. You’ll know it’s ready when you taste a pleasant sourness that balances the spice and garlic—not so mild that it tastes like raw seasoned vegetables, but not so fermented that it’s overwhelmingly sour.
Unlike cabbage kimchi that can ferment for weeks and develop increasingly complex flavors, buchu kimchi is best enjoyed in its younger stages. Most Korean home cooks will ferment it for 1-2 days at room temperature, then immediately move it to the refrigerator where it will stay fresh and crunchy for about 2-3 weeks. The cold storage significantly slows the fermentation, preserving that crisp texture that makes korean chive kimchi so appealing.
Maintaining Crunch and Maximizing Flavor in Your Kimchi
The hallmark of excellent buchu kimchi is maintaining that satisfying crunch while developing robust fermented flavors. Several factors influence whether your kimchi stays crisp or becomes disappointingly soft, and understanding these variables puts you in control of the final texture.
First, freshness of your chives is non-negotiable. Older chives that have been sitting in your refrigerator for a week will never achieve the same crispness as chives used within a day or two of purchase. When shopping, look for buchu that’s uniformly green with no brown or slimy spots, and that springs back when gently bent. If you’re buying from an Asian grocery store, try to go on days when they receive fresh deliveries—often mid-week.
Temperature management during fermentation is your second critical factor. While warmer temperatures speed up fermentation, they can also lead to softer vegetables. If you want maximum crunch, ferment at the cooler end of the acceptable range—around 65-68°F (18-20°C)—even if it means waiting an extra day for flavor development. Once you move your kimchi to refrigerator storage, keep it in the coldest part of your fridge, typically the back of the bottom shelf.
The salt level in your seasoning paste also affects texture. While we don’t directly salt buchu kimchi the way we do cabbage kimchi, the salt content in your fish sauce and soy sauce creates a light brining effect that helps maintain structure. If you find your kimchi consistently turns out too soft, try increasing your fish sauce by half a tablespoon in your next batch.
For flavor maximization, consider these professional tips: bloom your gochugaru by mixing it with a tablespoon of warm water and letting it sit for 5 minutes before making your paste—this awakens the pepper’s flavor compounds. Add a tablespoon of salted shrimp (saeujeot) or oyster sauce to your paste for an extra layer of umami complexity. Some cooks also add a teaspoon of rice flour mixed with water and briefly cooked into a paste, which acts as a binder and feeds the fermentation process.
🦪 Need oyster sauce? here’s the oyster sauce I use →
As an Amazon Associate I earn from qualifying purchases.
Storage Guidelines and Shelf Life
Proper storage extends your buchu kimchi’s life and maintains its quality throughout its eating window. After your initial room temperature fermentation period, transfer the kimchi to the refrigerator immediately. The cold environment dramatically slows fermentation, which is exactly what you want—buchu kimchi that over-ferments becomes mushy and develops an unpleasant sourness that overwhelms its delicate flavor.
In the refrigerator, your kimchi will remain at peak quality for about 2-3 weeks. During the first week, it continues to develop flavor slowly while maintaining excellent texture. By weeks 2-3, the chives are still good but may begin to soften slightly and the overall flavor becomes more intensely fermented. After 3 weeks, most batches start to lose their appealing crunch and the taste can become too sour for most palates.
Always use clean utensils when serving your kimchi to prevent introducing bacteria that could spoil the batch. Many Korean households keep a dedicated set of kimchi chopsticks or a small wooden spoon specifically for this purpose. After each use, press the remaining kimchi down so it’s submerged in its liquid—this prevents the top layer from drying out or developing mold.
If you notice white film forming on the surface of the liquid, don’t panic—this is kahm yeast, a harmless but aesthetically unpleasant byproduct of fermentation. Simply skim it off and ensure your kimchi stays submerged in its brine. However, if you see fuzzy mold (blue, green, or black), or if the kimchi smells rotten rather than pleasantly sour, it’s time to discard the batch.
For those interested in exploring more Korean culinary traditions beyond kimchi, check out the broader collection of Korean recipes and food culture articles available on the site.
Serving Suggestions and Recipe Variations
Buchu kimchi shines as a banchan (side dish) served alongside rice and other Korean dishes, but its uses extend well beyond the traditional small side dish bowl. The relatively mild flavor and tender texture make it more versatile than intensely fermented cabbage kimchi, opening up creative serving possibilities.
Serve it as a classic banchan with bibimbap, letting the garlicky chives complement the richness of the egg and meat toppings. It’s particularly excellent with grilled meats—the sharp, fermented notes cut through fatty flavors beautifully. Try it tucked into Korean tacos, mixed into fried rice for a quick flavor boost, or even layered into a grilled cheese sandwich for a fusion twist that actually works.
For recipe variations, consider these adaptations: add thin matchsticks of carrot for color and added crunch, or include a handful of Korean radish cut into similar-sized pieces as the chives. Some cooks create a spicier version by including thinly sliced fresh red chili peppers. For a version that’s more vegetable-forward and less pungent, reduce the garlic by half and add finely diced Asian pear, which contributes natural sweetness and enzymes that aid fermentation.
A popular variation called buchu geotjeori involves making the exact same dish but eating it immediately without fermentation—essentially a fresh Korean chive salad with kimchi-style seasoning. This is perfect when you want the flavors of kimchi but don’t have time for even the short fermentation period. Simply prepare the recipe exactly as described, and serve it right away. The trade-off is you won’t get the complex fermented tang, but you will enjoy maximum crunch and the bright, raw garlic flavor.
Common Questions About Making Korean Chive Kimchi
New kimchi makers often have similar questions when attempting their first batch of buchu kimchi. Can you substitute regular chives? Technically yes, but the flavor will be noticeably different—regular Western chives are much milder and more onion-forward, while Korean chives have that distinctive garlicky quality that defines the dish. If Korean chives are absolutely unavailable, garlic scapes make a better substitute than regular chives, offering a similar texture and garlicky flavor profile.
What if you can’t find fish sauce or prefer a vegetarian version? Replace the fish sauce with an equal amount of soy sauce plus one tablespoon of white miso paste, which provides similar umami depth without the seafood element. Some cooks add a small piece of dried kelp to the paste for additional savory complexity. The fermentation will work exactly the same way, though the flavor profile will be slightly different—still delicious, just not traditional.
Why isn’t my kimchi souring? If you’ve left your kimchi at room temperature for 2-3 days and it still tastes like raw seasoned vegetables, your environment is likely too cold for active fermentation. Try moving it to a warmer spot in your kitchen, perhaps on top of the refrigerator where heat rises, or even inside an oven with just the light on (which creates a gentle warmth). Alternatively, reduce the amount of sugar in your next batch, as excess sugar can sometimes inhibit the bacteria you want to encourage.
Exploring Korean cooking techniques like fermentation can deepen your appreciation for the culture’s broader traditions. If you’re interested in learning more about Korean culture and language, the Korean learning resources section offers helpful guides and insights.
Taking Your Kimchi-Making Skills Forward
Mastering this buchu kimchi recipe gives you a solid foundation in fermentation principles that apply to countless other preserved vegetables. The basic technique—creating a seasoned paste, coating vegetables, and managing fermentation time and temperature—remains consistent across different kimchi varieties. Once you’re comfortable with buchu kimchi, you’re ready to tackle more complex projects like napa cabbage kimchi, radish kimchi (kkakdugi), or cucumber kimchi (oi sobagi).
The real beauty of making your own kimchi at home is the control you gain over every aspect of the final product. You decide the spice level, the garlic intensity, the fermentation degree, and even the vegetable cuts. Commercial kimchi, while